Friday 25 March 2011

Evaluation

As a test shoot I feel that this shoot went well, it helped to to identify potential problems and allowed me to decide what changed I would make for my final shoot. In particular it allowed me to identify lighting set ups that I would like to use and some I would not.

With the lighting I am fairly certain that I can create the desired aesthetic, however it is the little touches that I need to make sure I improve, things such as more balloons, if i decide to use them again.

I am happy with my choice of model and would be happy to use her again in my final shoot should she be available to do so. However for the styling I intend to get in touch with DB3 and see if i can borrow the dresses I want for the day, the dresses I have seen there would be perfect for the shoot and if I could borrow a few it would be great to have the variety.

Also the hair needs to be much bigger and over the top, my model has clip in extensions that could be used. I was recently involved in the UCLAN style unwrapped fashion show, and for the show they used hair salon Jo and Cass to dress the hair, I will enquire into how much it would be for them to dress the hair for me. It would be good to get professionals to do it so that it goes the way I want for my final images.

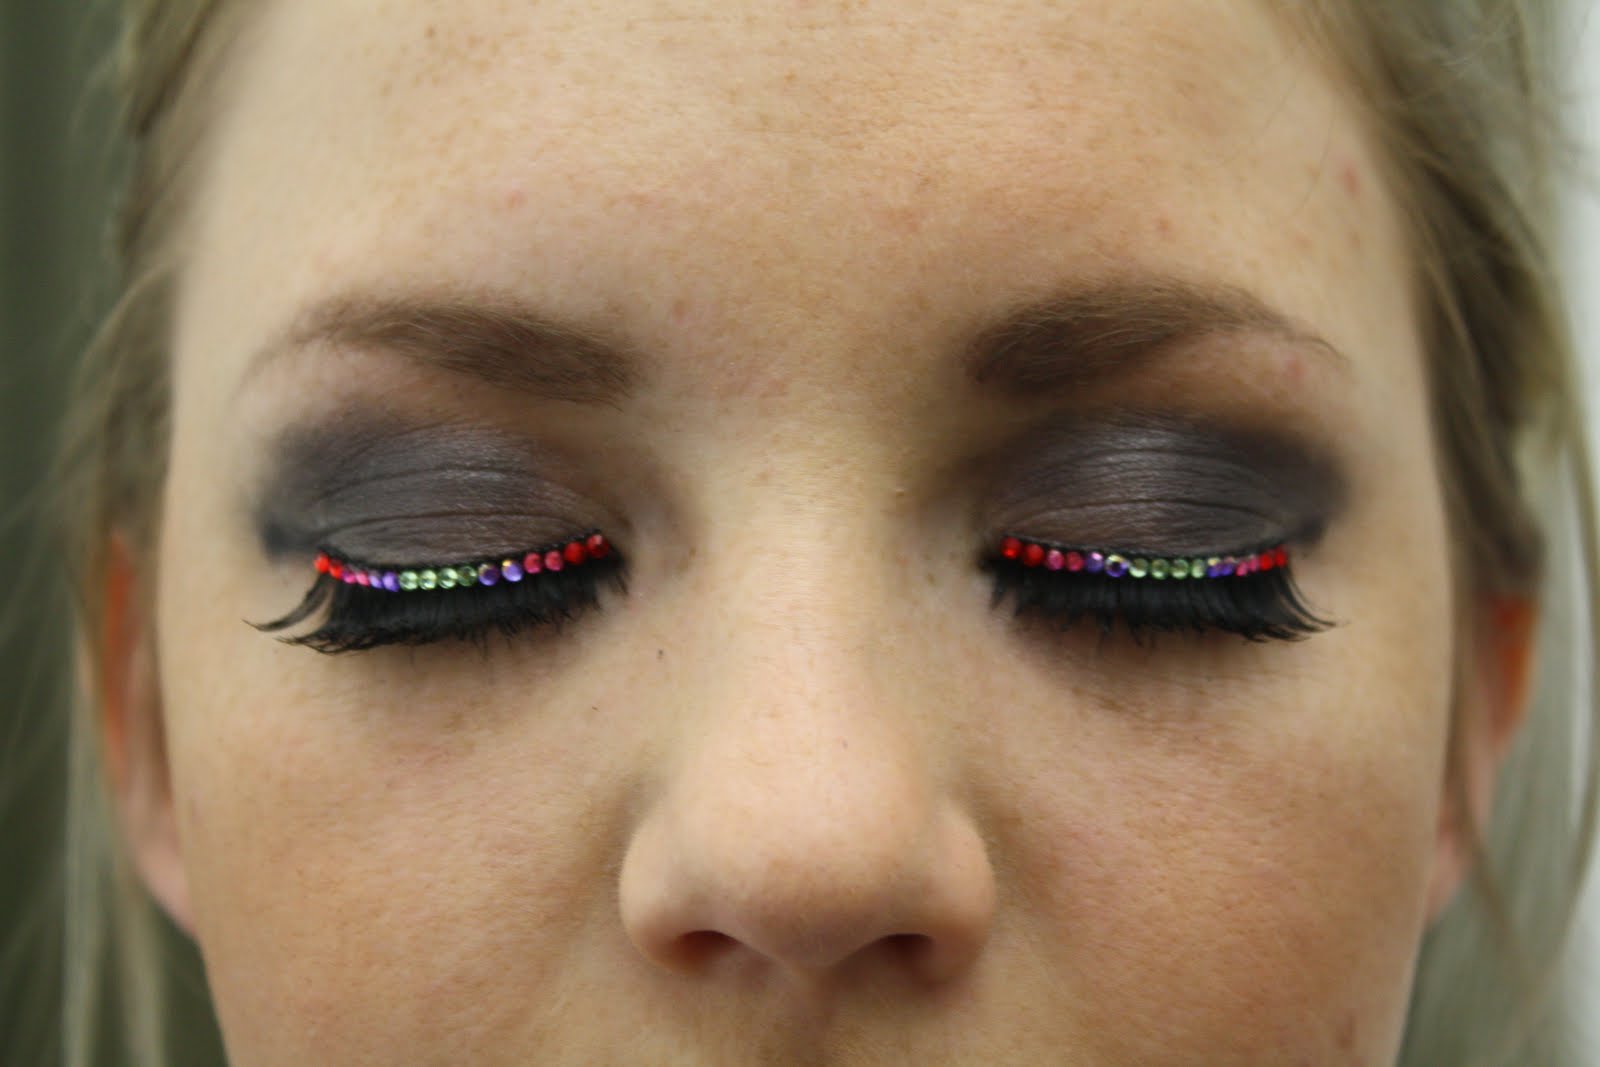
I also feel that the make up just isnt enough, I think that perhaps the false eyelashes I used are a little distracting (the sparkly bits) and make the eyes appear quite closed when I need them to be quite wide, and perhaps even manic at times. The make up needs to be much stronger and over the top, I have a makeup artist that was involved in the UCLAN fashion show on facebook, she is really good and I would be really interested in having her do the makeup for the final shoot so I will try and contact her over the next few days.

Overall I have learnt a lot from this shoot and am looking forward to my final shoot for this brief.

Set up 5

This is the last set up i used, initially I didnt want to use a white background again as the images I did last semester on a white background didnt turn out as well as i had hoped. However I decided that if I used props and just did the images differently on a whole I could still make the white background work. I used two large umbrellas, four poly boards, and a beauty dish to create my white background.


These are a few of the photographs I took using this set up. I decided to give the images a bit more of a playful feel by using the balloons but I also used the balloons to incorporate the pastel colours into the shoot (as i didnt have the intended pastel coloured dress). I got my two assistants to waft the balloons from either side to try and keep them up in the air and to try and keep them even. In a way i think that the balloons work well but in a way they dont, perhaps if i had more, and had more pastel coloured ones it would have worked better as on some of the images there is blank space in some places and lots of balloons in others. I think it worked best when the balloons remained in the background instead of the foreground, it looked better and also made it easier for the model to pose.


Set up 4

This was the fourth set up i created. I found an image on the internet and i quite liked the way the lighting and the pose looked so i tried to recreate it,it uses two lamps on lighting the model from the side on an angle and one lighting the background behind her.


These are some of the images i took using this lighting set up, i think that it creates quite an interesting effect and is quite unusual for a portrait although it worked quite nicely. However i could have perhaps used a reflector to get some of the detail back in her face on the side without the lamp.


Set up 3

This was the third lighting style i used, there was an image on the internet i had seen and i tried to deconstruct the lighting to see how i could create a similar style. I used one beauty dish on the side of her face and used the reflector to bounce light back onto her face so that there was still some detail in her face.

These are some of the images using this lighting style, it created the feel i was aiming for it just doesnt quite work as well in these images. Its not my favourite lighting set up out of the ones that I did but its interesting to try out a variety of different set ups.


Set up 2

This is the second lighting set up I created in the studio, this time on the white background, however I wanted it to appear grey as the my images on a white background werent as successful last time as id hoped. I used two lamps, one on each side one higher up pointing down and one lower down pointing slightly up. I decided to try out this set up to see what it looked like.

These are a few of the images from the shoot, I also decided to use bubbles within the shoot just to add something different and perhaps make it a bit more playful. In a way I like this set up as its quite different than what you would expect from the usual beauty queen portraits. The bubbles didnt work quite as well as id hoped but it was worth a try.


Set up 1

This is the first lighting set up i created (on a purple coloured background), its a set up that i have tested in the studio before hand when trying to decide on a lighting style for this shoot. I used a lamp either side of the model, and a beauty dish just above the camera, i then had an assistant reflecting light back towards the models face to try and get her eyes to stand out and be quite dominant in the image.


These are just a few of the images from this set up, i am happy with the aesthetic the lighting creates in the image, it has an almost old fashioned or year book style to it. I am happy that the detail in the dress and make up can be seen clearly within the images as i was worried that some the fine detail on the black dress would be difficult to capture.


Test Shoot - Contact sheet


These are the contact sheets from my shoot. For the shoot i created five different lighting set ups in order to get a clearer idea of which type of lighting i will use for my final shoot, i used set ups we have tested in the studio before and set ups i created based on images i saw on the internet.

Hair

This image shows the final make up and hair style for the shoot. The hair is very similar to the style although not as over the top as i would have perhaps liked it to be.


I wanted the hair to be styled like one of my research posts, so myself and a friend tried to recreate the look.

I was recently involved in a UCLAN fashion show and am thinking of asking the salon that did the hair for that if they will do the hair for my next shoot, I also want to contact a MUA (Makeup artist) to get the desired look.

Research on pose

Iv been doing some research on pose for this shoot, alot of the poses are very similar. Due to the limited amount of poses iv realised that it is crucial to get the pose right! The pose and facial expression need to be spot on in order for the images to work, especially with such a limited number of poses.


Monday 21 March 2011

Make up - eye lashes


I came across these false eyelashes while I was shopping for props for the shoot, I bought them because I thought they were very over the top and very 'beauty queen'. Im not sure how well they will work within the shoot as the detail is of course only small and might not be seen on shots taken further away, however it is certainly worth a try to see what they look like.

Styling problems

Unfortunately I couldn't manage to hire the dresses I wanted to use in time for the first shoot I arranged. However I saw this dress in topshop, the shape and style is perfect but im just not sure that the colour is going to be enough within the images, but if I can capture the detail and shape well it might just work.

Wednesday 16 March 2011

Potential model: Clare Ryan

This is a potential model that I am thinking of using for this shoot, she is very smiley and I think that she would work well as part of my beauty queen shoot. I also purposely chose quite a young model as I have been looking at child beauty contests.